Our Old Fashioned MILK PAINT recreates the
ancient MILK PAINT formula used for
centuries before commercially made paints
were sold. It provides an authentic finish
for restoring antiques or reproducing
antique furniture. It comes in rich, durable
colors that do not fade. Since our real MILK
PAINT is made from elements that predate
petrochemicals and other toxic bases and
solvents, it is biodegradable, non-toxic,
and odor-free when dry. Our MILK PAINT is
preferred by custom furniture builders,
interior designers, artists, craftsmen,
do-it-yourselfers, and those sensitive to
the need to protect the environment.
Applications
Our Farmhouse Finishes Safe Paint can be applied to most
clean, dry surfaces. While our traditional Old Fashioned
Milk Paint prefers a porous surface, Safe Paint is
formulated for nonporous surfaces such as previously
painted walls, new sheetrock, metal, and finished wood.
Once cured, it develops good water resistance; however,
for surfaces expected to receive heavier wear, we
recommend sealing with our Top Coat Final Finish. For
kitchen applications, an oil or solvent-based sealer is
recommended to protect against kitchen oils such as
grease splatters.
Where traditional milk paint is known for its flat,
uneven, somewhat streaky appearance, Safe Paint—while
still a true milk paint—delivers a more uniform,
consistent finish that remains very flat. It is suitable
for all interior wall applications, both residential and
commercial, including hospitals, retirement homes,
schools, nurseries, offices, stores, and public areas
used by people who are allergic or otherwise sensitive
to chemically based paints.
Physical Characteristics
Environmentally safe
Zero VOC’s- entirely solvent free
Faint milky odor when wet, odorless when dry
Dry to the touch in 30 minutes. To re-coat, wait two hours.
The dry powder form mixes best with room temperature water.
Permanent colors
Non-toxic and biodegradable
Non-flammable
Clean up with soap and water
Cures, hardens, and builds water resistance over time
Fast drying
Flat finish
Powder in sealed bags should last indefinitely. After opening, save powder in a glass jar or
covered tin or airtight plastic storage bin.
Available in a variety of colors which can be blended, by the user, to produce many tints and
shades
Milk Paint Directions
Very Important:Please read this entire Direction Sheet before using this
product.
ALL SURFACES MUST BE CLEAN AND DUST-FREE. Very glossy surfaces must be
lightly scuffed with sandpaper and cleaned before painting to ensure proper adhesion.lowes+5
If you can rub the palm of your hand across the wall and see dust, you will need to
vacuum and wash the wall thoroughly before painting
Simple to Use
Mix: Measure about equal amounts of water and powder into separate containers.
The one pint package contains about 1-1/2 cups of powder, and when mixed with 1-1/2 cups of
water it will make about 1 pint of paint. (Note: warm water helps.)
Apply: Apply with a dry brush, roller or spray gun. Natural bristle brushes are
fine, but foam brushes may require less effort and leave fewer brush marks. Milk paint is
naturally somewhat streaky in color. This is normal. The most even color is achieved by
spraying. Next best for evenness is by roller application. Again, you may find that foam rollers
are easier to control. For spraying, paint should be a little thinner than for brushing, and
should be strained. Spray with conventional spray equipment at about 30 lbs. pressure. Adjust
pressure and nozzle to get a good paint film, not dry and not runny. With a little practice you
should be able to spray a Windsor chair in about 3 or 4 minutes. Remember always wear proper
protection when spraying any paint.
Clean Up: Clean all tools now with water and a Scotch-brite pad so that the
paint doesn't dry on them.
Mixing Tips
Small Amounts: For larger quantities, use a paint paddle attached to an electric
drill and mix in a container larger than the amount of paint you are preparing (for example, use a
2½-gallon bucket when mixing a gallon of paint). Safe Paint mixes best with a mechanical mixer
rather than by hand. We've had good results using the "Exomixer" brand paint mixer—the "Original
Ribbon Mixer"—which blends both vertically and horizontally and is readily available (we found one
at Home Depot).
Large Amounts: For larger batches, attach a paint paddle to an electric drill and
mix in a container bigger than the volume of paint you're preparing (for instance, use a 2½-gallon
bucket when mixing one gallon of paint). Safe Paint achieves the best consistency with a mechanical
mixer rather than hand stirring. We recommend the "Exomixer" brand paint mixer—the "Original Ribbon
Mixer"—which blends both vertically and horizontally and is widely available (we purchased ours at
Home Depot).
Timing: Mix thoroughly for 2-3 minutes. Then let stand for 10-15 minutes so
everything has a chance to disperse completely.
Strain: Sometimes powder lumps don't fully dissolve. You may want to strain the
mixed paint through a paper mesh paint funnel, a piece of cheesecloth, or, better still, a piece of
nylon stocking.
Stir: Stir paint every 10 minutes or so while using and add more water if needed to
get the proper consistency if the paint thickens.
Best Used Fresh: Milk paint is always best mixed up fresh. If you happen to have
leftover paint, or need to wait a day to finish your project you may keep any unused paint in a
sealed container in the refrigerator (even plastic wrap held in place with a rubber band is fine).
It keeps best if mixed on the thinner side, even with a thin layer of water put on top of the paint
mixture. Being true to the original formulas we do not add unnatural preservatives or extenders to
our paint and due to its organic nature it can thicken and gel up over time, so it is best to mix up
what you plan to use that day if possible. Any unused powder can be stored indefinitely in an
airtight container such as a jar.
(A) Porous Surfaces Painting Procedures
New wood or other porous surfaces such as masonry.
Note: No primer is necessary – the first coat acts as its own primer on
most softwoods and open-grained hardwoods. However, close-grained hardwoods such as maple or birch
will require an initial coat of milk paint with Extra-Bond added, as in "B-2" below.
Clean: Wipe down the item with a damp rag to remove any dust and to pre-dampen
the surface.
Seal: Then, seal knots, if any (optional) with shellac (apply first coat of
milk paint while the shellac is still tacky) OR paint knots with a mixture of prepared milk
paint with Extra-Bond added, as in "B-2" below. You may also add the Extra-Bond into your entire
first coat if desired.
First Coat: Paint the entire item with a first coat of milk paint.
Second Coat: After an hour or more, if you wish, you can rub down the first
coat lightly with a Scotch-brite pad, fine sandpaper, or non-oiled steel wool. Now, if it looks
like it needs it, you can apply a second coat of straight milk paint. Finished: If you like the
look and the rough texture, your masterpiece is finished!!
Optional: After a couple of hours, or overnight, you may wish to rub down to a
satin-smooth finish and/or "distress" the finish. You can rub down the surface as in No. 4 above
or do any type of distressing at this time. Be sure to try any of these techniques on a test
piece to be sure you will like the end result.
Prevent Water Spotting: We recommend sealing the paint on any surface that is
susceptible to spills or in a damp area or if you will want to be able to wash the surface.
Without a sealer the paint is fine but it will water spot and readily absorb dirt. Any sealer
will work over the milk paint, but again, it is important to test the finish over a painted
scrap to be sure that you like the end result. Penetrating oils such as linseed, tung, or
blended oils like Watco Danish Oil will deepen the color considerably, but are beautiful over
the milk paint, especially on a piece of furniture such as a chair. Wax is fine, too, but, as
with the above oils, may not protect enough against coffee cup rings, for example, on a table
top. Clear gel finishes and most solvent based finishes usually work well as sealers but like
oils and waxes, do darken the paint color, and can tend to yellow a bit which may be of concern
if you are using a white milk paint. An oil or solvent based sealer may be the best option for
kitchen cabinets. On floors use a sealer meant for floors for best protection.
(B) Wall Painting Procedures
New wallboard and new plaster.
Prepare Surface: On sheetrock or masonry that has joint compound over joints
and nails, "joint banding" or "photographing" may produce problems caused by the differences in
porosities and surface texture of the face paper of the sheetrock or the roughness of masonry
and the smoothness of the joint compound. When viewed in direct lighting, the joints may be
visible. To avoid this phenomenon, an initial coat of "Sheetrock First Coat" or equivalent flat
latex wall primer (available at most paint stores) is advisable. We have also had good luck with
AFM Safecoat New Wallboard Primer. Note: We do NOT recommend using primer-sealers with stain
blockers such as Kilz or Zinsser Bin. Be sure to follow the manufacturer's recommendations
regarding cure time of plasters and primers before moving on to using the milk paint. Also,
additives in some modern plasters may inhibit proper adhesion of the milk paint in some cases,
which is another reason that we suggest the use of primers for plaster as well as sheetrock
surfaces.
Extra-Bond: To use the Extra-Bond, first mix the milk paint with water
according to the directions in "Simple to Use" mixing section, then add an equal amount of
Extra-Bond, and stir the two liquids together. You may actually use as little as one part
Extra-Bond to two parts of milk paint, but better adhesion may be achieved using equal parts.
Next, after the first coat is completely dry, paint a second coat of straight milk paint.
(Extra-Bond is not necessary in the second coat.)
Seal: Seal, if desired, as in "A-7," above.
(C) Non-Porous Surfaces Painting Procedures
Previously painted or otherwise finished surfaces, any other non-porous surface such as glass, metal,
enamel or pre-primed material.
Note: Unless you know the condition of the surfaces beneath previous coats
of finish, we do caution you about the use of milk paint over multiple layers of paint that may have
been applied without proper cleaning beforehand. Milk paint dries very rapidly and shrinks in all
directions while drying. This can pull and tug on the previous layers quite strongly, enough in some
cases to cause the weakly bonded underlayers to peel off, thereby creating serious problems. We also
do not recommend using milk paint over primer-sealers with stain blockers such as Kilz or Zinsser
Bin.
Prepare Surface: Good finishing practice states that any surface to be painted
or repainted must be cleaned and dulled, not shiny. All grime should be removed with a washing
soda such as T.S.P. and shiny surfaces should be scuffed up with sandpaper. Surface must be
clean, sound and free of oil, grease, dust and dirt. By ignoring this practice, the new paint
may not adhere well and future coats could peel off when repainted.
Test Surface: For previously painted multiple coated surfaces, it is very
important to also test the layers of paint for adhesion to each other. This is to be sure that
the old paint won't peel off and take the new paint with it. First, cut a one inch long "X" in
the old paint film with a razor blade or sharp knife. It's best to do this in a few different
areas. Then apply a strip of Scotch tape or masking tape over the "X", and rub the tape on
firmly. Then pull it off quickly. If the old paint comes off with the tape, you have poor
adhesion, usually created from re-painting over grime.
Remove Old Paint: If the old paint films have poor adhesion, we do not
recommend painting over with any water paint, including milk paint. The old paint should be
removed by stripping or sanding and scraping. If you don't remove it, the new paint may lift off
the old paint, at least in some areas. WARNING! If you scrape, sand or remove
old paint, you may release lead dust. LEAD IS TOXIC. EXPOSURE TO LEAD DUST CAN CAUSE SERIOUS
ILLNESS, SUCH AS BRAIN DAMAGE, ESPECIALLY IN CHILDREN. PREGNANT WOMEN SHOULD AVOID EXPOSURE.
Wear a NIOSH approved respirator to control lead exposure. Clean up carefully with a HEPA vacuum
and a wet mop. Before you start, find out how to protect yourself and your family by contacting
the National Lead Information Hotline at 1-800-424-LEAD or log on to www.epa.gov/lead.
Neutralize: On any surfaces that have been chemically stripped of finish, be
sure to neutralize any residual chemicals by wiping the surface with a 50/50 vinegar and water
solution prior to re-painting.
Prime Metal: Raw metal should be primed with a rust inhibiting primer.
Extra-Bond: Apply one coat of milk paint with Extra-Bond added, as in "B-2",
above, followed by a second coat of straight milk paint. This will work on MOST clean surfaces
where previous layers are sound and not weakly bonded as shown above, and that have been
prepared for painting as stated above. If you are unsure of the surface it is a good idea to
test the project first from start to finish in an unnoticeable area. This means applying two
coats in your test if that is what you plan to do on your project. Often times, on a
questionable surface, the first coat may appear to adhere, but sometimes an adhesion problem is
not apparent until you apply the second coat.
Seal: Seal, if desired, as in "A-7," above.
(D) Exterior Use
We
do not recommend Safe Paint for exterior use at this time, pending further outdoor exposure testing.
Update 8/2023: In 2020, we painted a plain pine board and left it outside, fully
exposed to the elements, as a long-term test. No Extra Bond or sealer was applied. Our shop is
located in Utah, where we experience intense desert heat in summer and heavy snow in winter. Three
years later, the board still looks great overall—just slightly weathered. It has faded somewhat, and
the paint has chipped off around the wood knots, but the finish remains largely intact.
Weight .06 kg
Size 1 Gallon, 1 Quart, 2 ounce sample, 5 Gallon
Sizes & Coverage
One pint: 8 oz. of powder mixed with water; covers approximately 35 square feet.
One quart: 16 oz. of powder mixed with water; covers approximately 75
square feet.
One gallon: 64 oz. of powder mixed with water; covers approximately 300
square feet.
Bulk sizes are available for volume use and for re-packagers.
Our Old Fashioned MILK PAINT recreates the
ancient MILK PAINT formula used for
centuries before commercially made paints
were sold. It provides an authentic finish
for restoring antiques or reproducing
antique furniture. It comes in rich, durable
colors that do not fade. Since our real MILK
PAINT is made from elements that predate
petrochemicals and other toxic bases and
solvents, it is biodegradable, non-toxic,
and odor-free when dry. Our MILK PAINT is
preferred by custom furniture builders,
interior designers, artists, craftsmen,
do-it-yourselfers, and those sensitive to
the need to protect the environment.
Applications
Our Farmhouse Finishes Safe Paint can be applied to most
clean, dry surfaces. While our traditional Old Fashioned
Milk Paint prefers a porous surface, Safe Paint is
formulated for nonporous surfaces such as previously
painted walls, new sheetrock, metal, and finished wood.
Once cured, it develops good water resistance; however,
for surfaces expected to receive heavier wear, we
recommend sealing with our Top Coat Final Finish. For
kitchen applications, an oil or solvent-based sealer is
recommended to protect against kitchen oils such as
grease splatters.
Where traditional milk paint is known for its flat,
uneven, somewhat streaky appearance, Safe Paint—while
still a true milk paint—delivers a more uniform,
consistent finish that remains very flat. It is suitable
for all interior wall applications, both residential and
commercial, including hospitals, retirement homes,
schools, nurseries, offices, stores, and public areas
used by people who are allergic or otherwise sensitive
to chemically based paints.
Physical Characteristics
Environmentally safe
Zero VOC’s- entirely solvent free
Faint milky odor when wet, odorless when dry
Dry to the touch in 30 minutes. To re-coat, wait two hours.
The dry powder form mixes best with room temperature water.
Permanent colors
Non-toxic and biodegradable
Non-flammable
Clean up with soap and water
Cures, hardens, and builds water resistance over time
Fast drying
Flat finish
Powder in sealed bags should last indefinitely. After opening, save powder in a glass jar or
covered tin or airtight plastic storage bin.
Available in a variety of colors which can be blended, by the user, to produce many tints and
shades
Milk Paint Directions
Very Important:Please read this entire Direction Sheet before using this
product.
ALL SURFACES MUST BE CLEAN AND DUST-FREE. Very glossy surfaces must be
lightly scuffed with sandpaper and cleaned before painting to ensure proper adhesion.lowes+5
If you can rub the palm of your hand across the wall and see dust, you will need to
vacuum and wash the wall thoroughly before painting
Simple to Use
Mix: Measure about equal amounts of water and powder into separate containers.
The one pint package contains about 1-1/2 cups of powder, and when mixed with 1-1/2 cups of
water it will make about 1 pint of paint. (Note: warm water helps.)
Apply: Apply with a dry brush, roller or spray gun. Natural bristle brushes are
fine, but foam brushes may require less effort and leave fewer brush marks. Milk paint is
naturally somewhat streaky in color. This is normal. The most even color is achieved by
spraying. Next best for evenness is by roller application. Again, you may find that foam rollers
are easier to control. For spraying, paint should be a little thinner than for brushing, and
should be strained. Spray with conventional spray equipment at about 30 lbs. pressure. Adjust
pressure and nozzle to get a good paint film, not dry and not runny. With a little practice you
should be able to spray a Windsor chair in about 3 or 4 minutes. Remember always wear proper
protection when spraying any paint.
Clean Up: Clean all tools now with water and a Scotch-brite pad so that the
paint doesn't dry on them.
Mixing Tips
Small Amounts: For larger quantities, use a paint paddle attached to an electric
drill and mix in a container larger than the amount of paint you are preparing (for example, use a
2½-gallon bucket when mixing a gallon of paint). Safe Paint mixes best with a mechanical mixer
rather than by hand. We've had good results using the "Exomixer" brand paint mixer—the "Original
Ribbon Mixer"—which blends both vertically and horizontally and is readily available (we found one
at Home Depot).
Large Amounts: For larger batches, attach a paint paddle to an electric drill and
mix in a container bigger than the volume of paint you're preparing (for instance, use a 2½-gallon
bucket when mixing one gallon of paint). Safe Paint achieves the best consistency with a mechanical
mixer rather than hand stirring. We recommend the "Exomixer" brand paint mixer—the "Original Ribbon
Mixer"—which blends both vertically and horizontally and is widely available (we purchased ours at
Home Depot).
Timing: Mix thoroughly for 2-3 minutes. Then let stand for 10-15 minutes so
everything has a chance to disperse completely.
Strain: Sometimes powder lumps don't fully dissolve. You may want to strain the
mixed paint through a paper mesh paint funnel, a piece of cheesecloth, or, better still, a piece of
nylon stocking.
Stir: Stir paint every 10 minutes or so while using and add more water if needed to
get the proper consistency if the paint thickens.
Best Used Fresh: Milk paint is always best mixed up fresh. If you happen to have
leftover paint, or need to wait a day to finish your project you may keep any unused paint in a
sealed container in the refrigerator (even plastic wrap held in place with a rubber band is fine).
It keeps best if mixed on the thinner side, even with a thin layer of water put on top of the paint
mixture. Being true to the original formulas we do not add unnatural preservatives or extenders to
our paint and due to its organic nature it can thicken and gel up over time, so it is best to mix up
what you plan to use that day if possible. Any unused powder can be stored indefinitely in an
airtight container such as a jar.
(A) Porous Surfaces Painting Procedures
New wood or other porous surfaces such as masonry.
Note: No primer is necessary – the first coat acts as its own primer on
most softwoods and open-grained hardwoods. However, close-grained hardwoods such as maple or birch
will require an initial coat of milk paint with Extra-Bond added, as in "B-2" below.
Clean: Wipe down the item with a damp rag to remove any dust and to pre-dampen
the surface.
Seal: Then, seal knots, if any (optional) with shellac (apply first coat of
milk paint while the shellac is still tacky) OR paint knots with a mixture of prepared milk
paint with Extra-Bond added, as in "B-2" below. You may also add the Extra-Bond into your entire
first coat if desired.
First Coat: Paint the entire item with a first coat of milk paint.
Second Coat: After an hour or more, if you wish, you can rub down the first
coat lightly with a Scotch-brite pad, fine sandpaper, or non-oiled steel wool. Now, if it looks
like it needs it, you can apply a second coat of straight milk paint. Finished: If you like the
look and the rough texture, your masterpiece is finished!!
Optional: After a couple of hours, or overnight, you may wish to rub down to a
satin-smooth finish and/or "distress" the finish. You can rub down the surface as in No. 4 above
or do any type of distressing at this time. Be sure to try any of these techniques on a test
piece to be sure you will like the end result.
Prevent Water Spotting: We recommend sealing the paint on any surface that is
susceptible to spills or in a damp area or if you will want to be able to wash the surface.
Without a sealer the paint is fine but it will water spot and readily absorb dirt. Any sealer
will work over the milk paint, but again, it is important to test the finish over a painted
scrap to be sure that you like the end result. Penetrating oils such as linseed, tung, or
blended oils like Watco Danish Oil will deepen the color considerably, but are beautiful over
the milk paint, especially on a piece of furniture such as a chair. Wax is fine, too, but, as
with the above oils, may not protect enough against coffee cup rings, for example, on a table
top. Clear gel finishes and most solvent based finishes usually work well as sealers but like
oils and waxes, do darken the paint color, and can tend to yellow a bit which may be of concern
if you are using a white milk paint. An oil or solvent based sealer may be the best option for
kitchen cabinets. On floors use a sealer meant for floors for best protection.
(B) Wall Painting Procedures
New wallboard and new plaster.
Prepare Surface: On sheetrock or masonry that has joint compound over joints
and nails, "joint banding" or "photographing" may produce problems caused by the differences in
porosities and surface texture of the face paper of the sheetrock or the roughness of masonry
and the smoothness of the joint compound. When viewed in direct lighting, the joints may be
visible. To avoid this phenomenon, an initial coat of "Sheetrock First Coat" or equivalent flat
latex wall primer (available at most paint stores) is advisable. We have also had good luck with
AFM Safecoat New Wallboard Primer. Note: We do NOT recommend using primer-sealers with stain
blockers such as Kilz or Zinsser Bin. Be sure to follow the manufacturer's recommendations
regarding cure time of plasters and primers before moving on to using the milk paint. Also,
additives in some modern plasters may inhibit proper adhesion of the milk paint in some cases,
which is another reason that we suggest the use of primers for plaster as well as sheetrock
surfaces.
Extra-Bond: To use the Extra-Bond, first mix the milk paint with water
according to the directions in "Simple to Use" mixing section, then add an equal amount of
Extra-Bond, and stir the two liquids together. You may actually use as little as one part
Extra-Bond to two parts of milk paint, but better adhesion may be achieved using equal parts.
Next, after the first coat is completely dry, paint a second coat of straight milk paint.
(Extra-Bond is not necessary in the second coat.)
Seal: Seal, if desired, as in "A-7," above.
(C) Non-Porous Surfaces Painting Procedures
Previously painted or otherwise finished surfaces, any other non-porous surface such as glass, metal,
enamel or pre-primed material.
Note: Unless you know the condition of the surfaces beneath previous coats
of finish, we do caution you about the use of milk paint over multiple layers of paint that may have
been applied without proper cleaning beforehand. Milk paint dries very rapidly and shrinks in all
directions while drying. This can pull and tug on the previous layers quite strongly, enough in some
cases to cause the weakly bonded underlayers to peel off, thereby creating serious problems. We also
do not recommend using milk paint over primer-sealers with stain blockers such as Kilz or Zinsser
Bin.
Prepare Surface: Good finishing practice states that any surface to be painted
or repainted must be cleaned and dulled, not shiny. All grime should be removed with a washing
soda such as T.S.P. and shiny surfaces should be scuffed up with sandpaper. Surface must be
clean, sound and free of oil, grease, dust and dirt. By ignoring this practice, the new paint
may not adhere well and future coats could peel off when repainted.
Test Surface: For previously painted multiple coated surfaces, it is very
important to also test the layers of paint for adhesion to each other. This is to be sure that
the old paint won't peel off and take the new paint with it. First, cut a one inch long "X" in
the old paint film with a razor blade or sharp knife. It's best to do this in a few different
areas. Then apply a strip of Scotch tape or masking tape over the "X", and rub the tape on
firmly. Then pull it off quickly. If the old paint comes off with the tape, you have poor
adhesion, usually created from re-painting over grime.
Remove Old Paint: If the old paint films have poor adhesion, we do not
recommend painting over with any water paint, including milk paint. The old paint should be
removed by stripping or sanding and scraping. If you don't remove it, the new paint may lift off
the old paint, at least in some areas. WARNING! If you scrape, sand or remove
old paint, you may release lead dust. LEAD IS TOXIC. EXPOSURE TO LEAD DUST CAN CAUSE SERIOUS
ILLNESS, SUCH AS BRAIN DAMAGE, ESPECIALLY IN CHILDREN. PREGNANT WOMEN SHOULD AVOID EXPOSURE.
Wear a NIOSH approved respirator to control lead exposure. Clean up carefully with a HEPA vacuum
and a wet mop. Before you start, find out how to protect yourself and your family by contacting
the National Lead Information Hotline at 1-800-424-LEAD or log on to www.epa.gov/lead.
Neutralize: On any surfaces that have been chemically stripped of finish, be
sure to neutralize any residual chemicals by wiping the surface with a 50/50 vinegar and water
solution prior to re-painting.
Prime Metal: Raw metal should be primed with a rust inhibiting primer.
Extra-Bond: Apply one coat of milk paint with Extra-Bond added, as in "B-2",
above, followed by a second coat of straight milk paint. This will work on MOST clean surfaces
where previous layers are sound and not weakly bonded as shown above, and that have been
prepared for painting as stated above. If you are unsure of the surface it is a good idea to
test the project first from start to finish in an unnoticeable area. This means applying two
coats in your test if that is what you plan to do on your project. Often times, on a
questionable surface, the first coat may appear to adhere, but sometimes an adhesion problem is
not apparent until you apply the second coat.
Seal: Seal, if desired, as in "A-7," above.
(D) Exterior Use
We
do not recommend Safe Paint for exterior use at this time, pending further outdoor exposure testing.
Update 8/2023: In 2020, we painted a plain pine board and left it outside, fully
exposed to the elements, as a long-term test. No Extra Bond or sealer was applied. Our shop is
located in Utah, where we experience intense desert heat in summer and heavy snow in winter. Three
years later, the board still looks great overall—just slightly weathered. It has faded somewhat, and
the paint has chipped off around the wood knots, but the finish remains largely intact.
Weight .06 kg
Size 1 Gallon, 1 Quart, 2 ounce sample, 5 Gallon
Sizes & Coverage
One pint: 8 oz. of powder mixed with water; covers approximately 35 square feet.
One quart: 16 oz. of powder mixed with water; covers approximately 75
square feet.
One gallon: 64 oz. of powder mixed with water; covers approximately 300
square feet.
Bulk sizes are available for volume use and for re-packagers.
Returning merchandise to Eco Building Products is designed to be straightforward and hassle-free. If you need to return an item, simply ensure that your return is initiated within 30 days of receiving your products. To be eligible for a refund, the merchandise must be received by our warehouse in resalable condition, so please take care to package your items securely before shipping them back.
To get started, complete our easy-to-use Return Form. This step is essential, as it allows us to provide you with a specific return instructions, including the correct warehouse address and a Return Merchandise Authorization (RMA) number for your package. This helps ensure your return is processed quickly and accurately.
Please note that you are responsible for arranging and paying for the return shipping. In some cases, returns may be subject to a 25% restocking fee. Once your returned items arrive at the warehouse and are confirmed to be in resalable condition, we will process your refund promptly. Our goal is to make the return process as smooth as possible, so if you have any questions or need assistance at any step, our customer service team is always here to help.
Technical Support
At Eco Building Products, we understand that you may have technical questions to make a well-informed purchasing decision, or questions may arise at any project stage. Our Technical Support Team is committed to providing accurate, reliable support. We can often refer you to the product's safety data sheet (SDS) or detailed installation instructions, which frequently address the most common technical concerns and provide step-by-step guidance.
Our in-house product line specialist is knowledgeable and often qualified to answer a wide range of technical questions about our products. Whether you need advice on application methods, compatibility, or performance characteristics, our specialist can provide clear, practical information tailored to your needs.
However, we recognize that some situations require even more specialized expertise. When your questions or concerns exceed our team's scope, we don't leave you without answers. Instead, we work closely with the product manufacturer, leveraging their resources and expertise to provide the most accurate and up-to-date information. At Eco Building Products, we aim to ensure you have the technical support you need, no matter how complex the issue, so that you can proceed confidently on every project.
Customer Service
At Eco Building Products, our customer support team is dedicated to ensuring your experience is smooth, reliable, and satisfying from start to finish. We work hard to ensure every order is shipped promptly and arrives at your doorstep unscathed and in excellent condition. However, we understand that sometimes things don't go as planned. If your products arrive damaged, are lost in transit, you receive the wrong item, or encounter any other issue, our friendly customer service team is always ready and happy to help resolve the problem quickly and efficiently
Fast and Efficient Shipping
Eco Building Products is committed to providing fast, efficient, and affordable shipping. We ship from eleven warehouses located strategically across the mainland United States. Each warehouse is near a major interstate. Not all warehouses carry the same inventory. Except for product pages that offer expedited shipping, we do not offer same-day shipping. Please allow 24 hours for packaging and handling before your order ships.
Sign up for emails.
Sign up for our Bi-Weekly Promotions and Rewards Program. Click here to sign up.
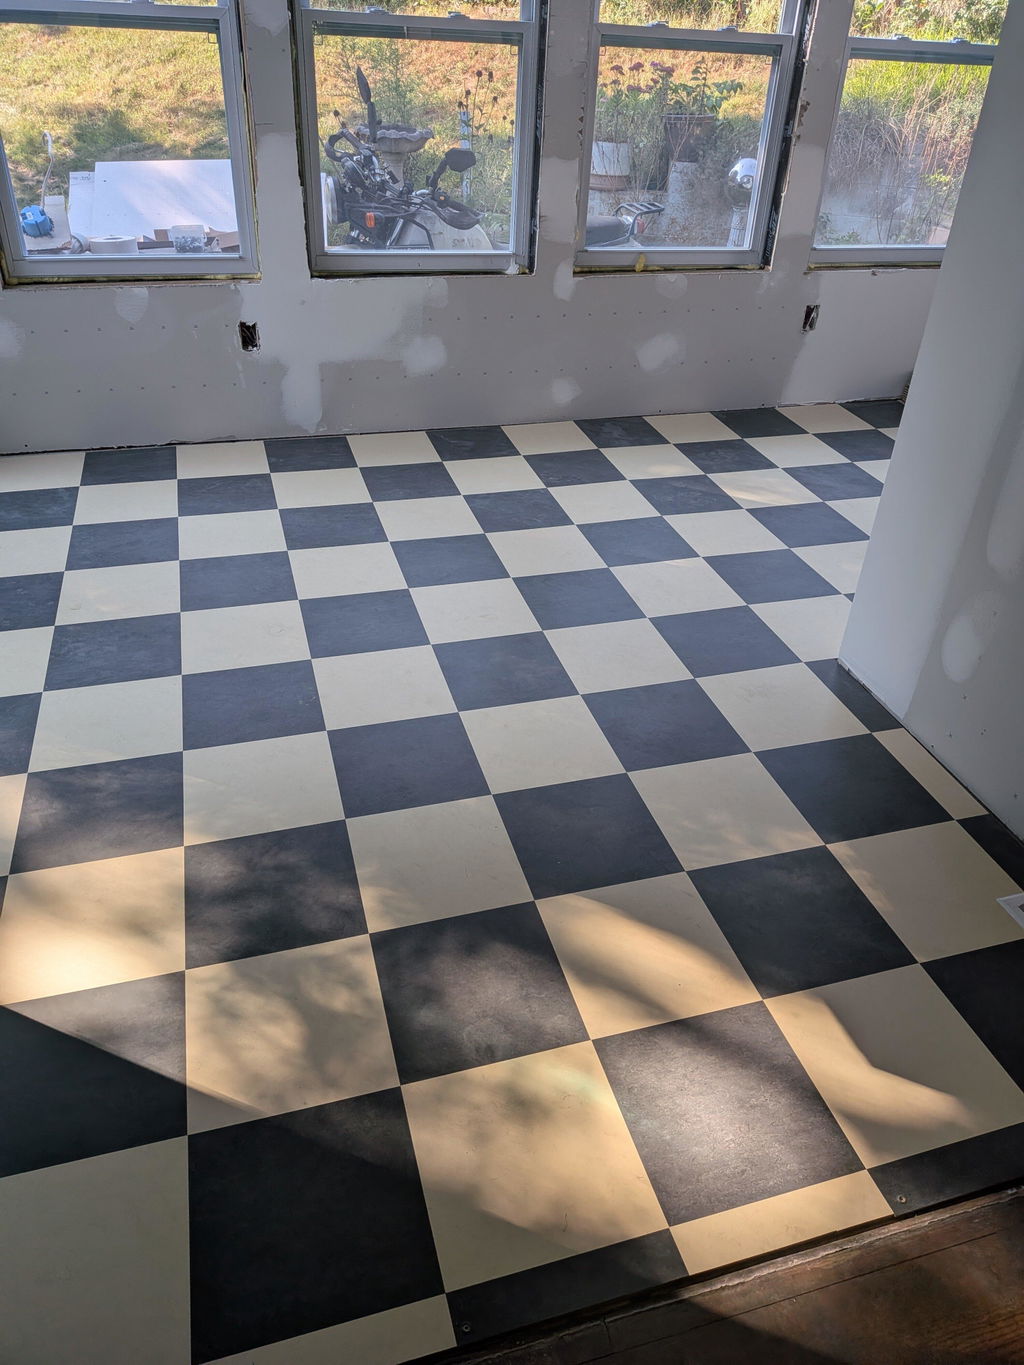
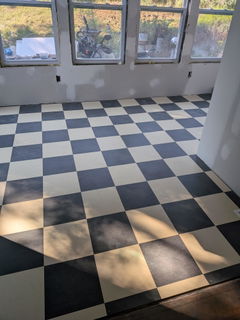
We went with a checkerboard design using Barbados and Volcanic Ash and they turned out beautifully! They are easy to clean and I couldn't be happier with the way they look. Eco Building Product's staff were very communicative and helpful! Overall great experience!
I’m in heating zone 6 so I bought the Havelock wool R22 16” on center insulation to upgrade the 60 year old 2” Fiberglass insulation in the knee walls in my basement. I found the wool insulation hard to cut with a utility knife so I used a pair of kitchen scissors and made 3-4 passes. I liked being able to handle the insulation without needing gloves.
Ordered this product to update insulation in the knee wall in my basement. I found cutting it with a utility knife extremely hard but with a pair of kitchen shears and a few passes it did the trick. Couldn’t be happier with my purchase.
Second coat did the job to seal the off gassing from wood subfloor. However, it has been 2 days & I can't eliminate the smell from the Hard Seal. I've had windows open, running fans, A/C on - smell is not dissipating. Kilz Premium 3 would have done this in 1 coat & all odors gone in less than 24 hours - I may have to roll on a coat. I have MCS and still can't work in this room. How long does it take to off gas???
We went with a checkerboard design using Barbados and Volcanic Ash and they turned out beautifully! They are easy to clean and I couldn't be happier with the way they look. Eco Building Product's staff were very communicative and helpful! Overall great experience!
Forbo Marmoleum Click Cinch Loc Tile Flooring
Joseph Rasada
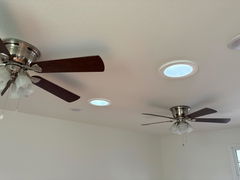
Solar tube diffuser
Quick delivery & works great
Solatube Vusion Thinline Diffuser
REMJr
Easy Cost Affective Air Flow Sealing
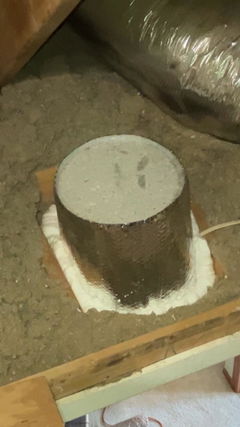
I’m increasing the depth of the attic insulation. I needed a way to seal against air flow around the fourteen ceiling recessed can light fixtures. I found these online and decided to purchase them rather than try and fabricate something on my own.
Ordering was easy and they arrived quickly and intact. They are well constructed and air tight.
I was able to make cuts where necessary to have the covers sit flush with the sheet rock. I used Great Stuff sealing foam to attach and seal around the covers. I allowed a day for the foam to set, the covers are securely attached and seal around the light fixtures.
The cost, quality and convenience of these covers made this job much easier than trying to fabricate a cover on my own. I highly recommend them!
Attic Insulation Covers for Recessed Lights
Steven Ralph
Insulation Just What I needed
I’m in heating zone 6 so I bought the Havelock wool R22 16” on center insulation to upgrade the 60 year old 2” Fiberglass insulation in the knee walls in my basement. I found the wool insulation hard to cut with a utility knife so I used a pair of kitchen scissors and made 3-4 passes. I liked being able to handle the insulation without needing gloves.




 Cart
Cart